Monday, April 11, 2022

Winget

 There is an awesome command line tool you can use in Windows 10 and 11 to update installed apps on your computer from the command line.  


It's called winget 

In the Microsoft app store download and install App Installer from Microsoft


Once installed here are the basic winget commads


  • winget install <package> —install a package
  • winget uninstall <package> — remove package
  • winget upgrade – update software package
  • winget list – list installed apps on Windows
  • winget show <package> — display the package info
  • winget source <options> — manage repositories
  • winget search <search_string> — search for packages in repositories
  • winget export – export the list of installed programs to a file
  • winget import – installation of programs (packages) according to the list in the file
  • winget hash <package> — get a package installer hash
  • winget validate <package> — to validate a manifest file


Tuesday, June 5, 2018

Ubuntu 18.04 Linux

I recently decided to refresh my Linux skills.  About a decade ago I had to maintain several Linux servers (mail, DNS, web. etc.,) and became fairly acquainted with the Linux operating system but since then I haven't worked with Linux much and so my skills have gotten rusty, to say the least.

I have VMWare Fusion running on my MacBook Air.  

1.  downloaded the Ubuntu Desktop 18.04 ISO to my laptop.  I downloaded the desktop version because I wanted the GUI.  The server version does not include the GUI.  Since I know I'm rusty the GUI helps me.  But the downside is it does not have many of the server apps installed such as Bind9, Apache, Sendmail., etc.  I will have to install those applications separately.  Installing them is not difficult.  Configuring them is another matter.

2.  created a new VM and set the iso on the DVD/CD drive so that when the VM boots for the first time it would run through the install.  
     a.  20gb disk space.   
     b.  1024 memory
     c.  1 processor core

3.   the initial installation completed without any issues.

4.  after the initial installation the first thing you'll want to do is update your Linux OS.

Apt-get upgrade VS dist-upgrade

I typically upgrade my machines with:
sudo apt-get update && time sudo apt-get dist-upgrade
Below is an excerpt from man apt-getUsing upgrade keeps to the rule: under no circumstances are currently installed packages removed, or packages not already installed retrieved and installed. If that's important to you, use apt-get upgrade If you want things to "just work", you probably want apt-get dist-upgrade to ensure dependencies are resolved.
To expand on why you'd want upgrade instead of dist-upgrade, if you are a systems administrator, you need predictability. You might be using advanced features like apt pinning or pulling from a collection of PPAs (perhaps you have an in-house PPA), with various automations in place to inspect your system and available upgrades instead of always eagerly upgrading all available packages. You would get very frustrated when apt performs unscripted behavior, particularly if this leads to downtime of a production service.
upgrade
    upgrade is used to install the newest versions of all packages
    currently installed on the system from the sources enumerated in
    /etc/apt/sources.list. Packages currently installed with new
    versions available are retrieved and upgraded; under no
    circumstances are currently installed packages removed, or packages
    not already installed retrieved and installed. New versions of
    currently installed packages that cannot be upgraded without
    changing the install status of another package will be left at
    their current version. An update must be performed first so that
    apt-get knows that new versions of packages are available.

dist-upgrade
    dist-upgrade in addition to performing the function of upgrade,
    also intelligently handles changing dependencies with new versions
    of packages; apt-get has a "smart" conflict resolution system, and
    it will attempt to upgrade the most important packages at the
    expense of less important ones if necessary. So, dist-upgrade
    command may remove some packages. The /etc/apt/sources.list file
    contains a list of locations from which to retrieve desired package
    files. See also apt_preferences(5) for a mechanism for overriding
    the general settings for individual packages.


The next I decided to do was install Webmin.
Webmin is a web-based interface for system administration for Unix. Using any modern web browser, you can setup user accounts, Apache, DNS, file sharing and much more. Webmin removes the need to manually edit Unix configuration files like /etc/passwd, and lets you manage a system from the console or remotely.


How to install Webmin 

Open the file in your editor:
  • sudo nano /etc/apt/sources.list
Then add this line to the bottom of the file to add the new repository:
/etc/apt/sources.list
 . . . 
deb http://download.webmin.com/download/repository sarge contrib
Save the file and exit the editor.
Next, add the Webmin PGP key so that your system will trust the new repository:
  • wget http://www.webmin.com/jcameron-key.asc
  • sudo apt-key add jcameron-key.asc
Next, update the list of packages to include the Webmin repository:
  • sudo apt-get update
Then install Webmin:
  • sudo apt-get install webmin
Once the installation finishes, you be presented with the following output:
Output
Webmin install complete. You can now login to https://your_server_ip:10000 as root with your root password, or as any user who can use `sudo`.

No is a good time to reboot

using terminal issue command
sudo shutdown -r now


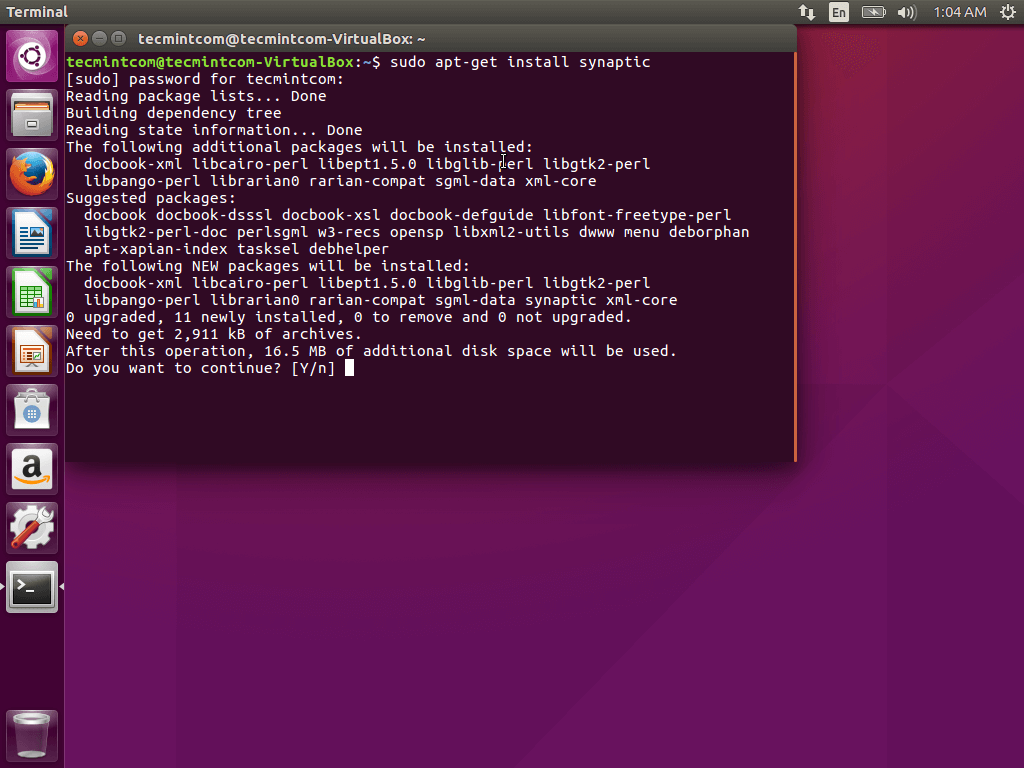
Next, I wanted to install a package manager so I can do package or application install via the GUI.  I'm not a big fan of the package manager that Ubuntu 18.04 comes with (Software Center) so I installed synaptic which I feel is easier for me to use.

You can install it by running the command:
sudo apt-get install synaptic


Install Synaptic Package Manager


Sunday, April 3, 2016

How to connect yahoo to Outlook

A lot of people are having trouble connecting Outlook 365 and previous versions of outlook.  I myself struggled to find the correct setting but after much research I found the information and I'm sharing it below.


The link to the original article is https://help.yahoo.com/kb/SLN15165.html

**also you may have to create a one time password (as I did) to access the account which is done within Yahoo.**


Access Yahoo Mail in Outlook 2013

Don't have access to the Web, but need your Yahoo Mail? Access your Yahoo Mail offline using a POP mail client like Microsoft Outlook 2013. It's convenient, and we have the steps to get you started.
 Make sure you've set up POP access in Yahoo Mail before continuing. Learn how to enable POP access.

Setting up Yahoo Mail in Outlook 2013

  1. In Outlook 2013, click File | Add Account.
  2. Select Manual setup or additional server types.
  3. Click Next.
  4. Select POP.
  5. Click Next.
  6. On the "Account Settings" page, enter your account settings:
    • Your Name - The name you want to show when you send email.
    • Email address: - Your full Yahoo Mail address.
    • Account Type - POP3
    • Server information - Make sure your settings match the Yahoo Mail POP settings.
    • User Name - Your Yahoo ID.
    • Password - Your Yahoo Account password.
    • Leave the "Require logon using Secure Password Authentication" option unchecked.
  7. Click More Settings.
  8. Click the Outgoing Server tab.
    • Select the My outgoing server (SMTP) requires authentication box.
    • Click Use same settings as my incoming mail server.
  9. Click the Advanced tab, then enter the following:
    • Incoming server (POP3) port - 995
    • Select This server requires an encrypted connection (SSL).
    • Outgoing server (SMTP) port - 465, 587, or 25
    • Set the encryption type to SSL or TLS
    • Set your desired server timeout and delivery options.
      - We recommend leaving a copy of messages on the server.
  10. Click OK.
  11. Restart Outlook.
  12. Click Send/Receive All Folders.
You'll now be able to receive your Yahoo Mail emails in your Outlook 2013 account.
If you have problems sending or receiving Yahoo Mail with Outlook 2013, check out our suggestions for fixing Yahoo Mail problems with POP mail clients.


For IMAP


IMAP server settings for Yahoo Mail

IMAP is the best way to connect your Yahoo Mail account to a desktop mail client or mobile app. It allows 2-way syncing, which means everything you do remotely is reflected in your Yahoo Mail account no matter where or how you access it. Here are the settings you'll need to configure your mail client or app.
Incoming Mail (IMAP) Server
  • Server - imap.mail.yahoo.com
  • Port - 993
  • Requires SSL - Yes
Outgoing Mail (SMTP) Server
  • Server - smtp.mail.yahoo.com
  • Port - 465 or 587
  • Requires SSL - Yes
  • Requires authentication - Yes
Your login info
  • Email address - Your full email address (name@domain.com)
  • Password - Your account's password
  • Requires authentication - Yes
If you need specific instructions for your mail client or app, reach out to its manufacturer.


Wednesday, October 1, 2014

Online Privacy Tools

Linux Tails
Tails is a live operating system, that you can start on almost any computer from a DVD, USB stick, or SD card. It aims at preserving your privacy and anonymity, and helps you to:
  • use the Internet anonymously and circumvent censorship;
    all connections to the Internet are forced to go through the Tor network;
  • leave no trace on the computer you are using unless you ask it explicitly;
  • use state-of-the-art cryptographic tools to encrypt your files, emails and instant messaging.
https://tails.boum.org/

TOR
What is Tor?
Tor is free software and an open network that helps you defend against traffic analysis, a form of network surveillance that threatens personal freedom and privacy, confidential business activities and relationships, and state security.
https://www.torproject.org/
ProtonMail
Free secure email.  Servers not in the US.
https://protonmail.ch
Truecrypt
Open source file and space encryption software
Currently unavailable due to unresolved security issues discovered.


Sunday, January 5, 2014

windows 7 automatic updates wont run, error 8024800A

If you can no longer run automatic updates, and it comes up with an error message 8024800A Windows Update encountered an unknown error follow the steps below to correct -

start cmd (START > RUN > CMD, run as Administrator) and copy and paste the following lines:

REG DELETE "HKLM\SOFTWARE\Microsoft\Windows\CurrentVersion\WindowsUpdate" /v SusClientId /f
REG DELETE "HKLM\SOFTWARE\Microsoft\Windows\CurrentVersion\WindowsUpdate" /v SusClientIdValidation /f

net stop wuauserv

move %windir%\windowsupdate.log %windir%\windowsupdate.old.log
move %windir%\SoftwareDistribution %windir%\SoftwareDistribution.old

regsvr32 /s atl.dll
regsvr32 /s wucltui.dll
regsvr32 /s wups.dll
regsvr32 /s wuaueng.dll
regsvr32 /s wuapi.dll
regsvr32 /s msxml3.dll
regsvr32 /s mssip32.dll
regsvr32 /s initpki.dll
regsvr32 /s softpub.dll

net start wuauserv

wuauclt /resetauthorization /detectnow

Sunday, December 8, 2013

How to fix - Setup cannot find ProPlus.WW\ProPsWW2.cab

When you receive the error "Setup cannot find ProPlus.WW\ProPsWW2.cab" it might mean the MD5 checksum the install was expecting and the one on the actual file do not match.  Here's how I fixed the issue.

First let me explain in simple terms what the MD5 is.  MD5 is an algorithm that is used to verify data integrity.  If anything in the file changes the MD5 will also change so it's a way for the program to check the integrity of the file.

The MD5 file is kept in the setup file of the proplus.ww folder.  Open it with notepad and find the section that looks similar to the following **the numbers after "MD5 ="  is what you need to be concerned with.  Also remember that your numbers may differ. **


<LocalCache DownloadCode="{90140000-0011-0000-0000-0000000FF1CE}" SkuComponentDirectory="ProPlus.WW">
<File Id="Office64WW.xml" MD5="899A7D743D01852EBD036B465D1EF181" Size="4685" RelativeCachePath="Office64WW.xml" RelativeSourcePath="Office64WW.xml"/>
<File Id="Office64WW.msi" MD5="43B44C38BE513D9589ECAC7129DDC7C3" Size="3025408" RelativeCachePath="Office64WW.msi" RelativeSourcePath="Office64WW.msi"/>
<File Id="OWOW64WW.cab" MD5="E1E97F01F4292B89953204557A043C7D" Size="23865400" RelativeCachePath="OWOW64WW.cab" RelativeSourcePath="OWOW64WW.cab"/>
<File Id="ProPlusWW.xml" MD5="146CA2B8E1559F81E8DF6A3AED949E2A" Size="17252" RelativeCachePath="ProPlusWW.xml" RelativeSourcePath="ProPlusWW.xml"/>
<File Id="ProPlusWW.msi" MD5="F7DCCD578605F72AEEED775C9EB40AB8" Size="24809472" RelativeCachePath="ProPlusWW.msi" RelativeSourcePath="ProPlusWW.msi"/>
<File Id="ProPsWW.cab" MD5="3EA469E81A6064AE4BEFE4A9ACF36A9D" Size="149278843" RelativeCachePath="ProPsWW.cab" RelativeSourcePath="ProPsWW.cab"/>
<File Id="ProPsWW2.cab" MD5="86BEB0B6A2E76E95E580615185C06B04" Size="197934115" RelativeCachePath="ProPsWW2.cab" RelativeSourcePath="ProPsWW2.cab"/>
<File Id="setup.exe" MD5="4D92F518527353C0DB88A70FDDCFD390" Size="1100664" RelativeCachePath="setup.exe" RelativeSourcePath="..\setup.exe"/>
<File Id="osetup.dll" MD5="FCC38158C5D62A39E1BA79A29D532240" Size="5789544" RelativeCachePath="osetup.dll" RelativeSourcePath="osetup.dll"/>
<File Id="ose.exe" MD5="9D10F99A6712E28F8ACD5641E3A7EA6B" Size="149352" RelativeCachePath="ose.exe" RelativeSourcePath="ose.exe"/>
<File Id="pkeyconfig-office.xrm-ms" MD5="3DCFF1DCDEB1B837EC8F13351C8A92AC" Size="715834" RelativeCachePath="pkeyconfig-office.xrm-ms" RelativeSourcePath="pkeyconfig-office.xrm-ms"/>
<File Id="PidGenX.dll" MD5="7F120AAD20ECAE1EA421083F26611519" Size="1248016" RelativeCachePath="PidGenX.dll" RelativeSourcePath="PidGenX.dll"/>
<File Id="Setup.xml" MD5="" Size="" RelativeCachePath="Setup.xml" RelativeSourcePath="Setup.xml"/>
</LocalCache>

Next you will need to download and install an MD5 checker.   I'll leave the process of how to use the MD5 to you to learn but it's pretty simple.

Next run the MD5 checker on the file/s that produce the errors during install.  *there may be more than one*

Now there are 2 ways to work around this - If the MD5 on the checker did not match the MD5 in the file it probably means the file is corrupted so your best bet is to download the software again or get another disk.

Another less recommended way is to copy/paste the MD5 from the checker into the file (remember to make a backup of your setup file before) then save it and run the install again.  This fools the installation process into verifying that your installation files are all OK.

Good luck!!


Sunday, June 16, 2013

Debian - Apt-get : NO_PUBKEY / GPG error

Issue
When updating the Debian based system, apt-get may display an error message like: 


W: GPG error: ftp://ftp.debian.org/ testing Release:       
The following signatures couldn't be verified because the public key is not available: NO_PUBKEY 010908312D230C5F      

W: There is no public key available for the following key IDs:      
010908312D230C5F


This is a new feature of the apt-get system that guarantees the authenticity of servers for updating Debian. 

Solution

Simply type the following commands, taking care to replace the number below with that of the key that was displayed in the error message: 
gpg --keyserver pgpkeys.mit.edu --recv-key  010908312D230C5F      
gpg -a --export 010908312D230C5F | sudo apt-key add -


I copied this solution from 
http://en.kioskea.net/faq/809-debian-apt-get-no-pubkey-gpg-error